

This neat little bookmark is super easy to make and quick too! What's even better is you can customize it any way you like. You can add buttons, ribbons, bows, different fabrics, you name it! I'll show you the very basics, though, for starters.
HERE'S WHAT YOU'LL NEED:

- Two squares of felt or fabric of your choice
- Scissors
- Needle and Thread/Embroidery Floss
- Embellishments of your choice (here I have chosen to simply add ribbon to the corner)

Cut one of the squares in half. OR if you feel like a little flair, try cutting it into a heart shape. It's all up to you!

Pin the two pieces together, lining the corners up as shown in the picture to the left. Since I chose to add a little ribbon to the corner, I pinned that between the two pieces of fabric as well.

Begin sewing around the two top edges. I find it relaxing to sew by hand, so I chose to use embroidery floss. That way, the stitches remained visible to match the ribbon. Slightly less boring looking perhaps?

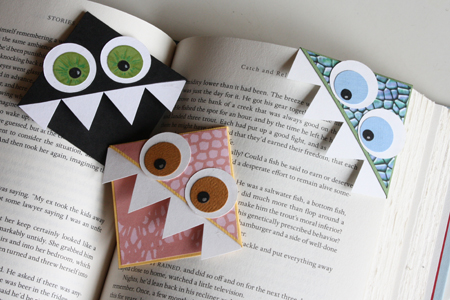
When you finish sewing, it should look a little something like this. If you have any last touches you would like to include, do so now. Here are some ideas I got from Google and Pinterest to inspire you:


No comments:
Post a Comment
Thanks for visiting! I always read every single one of your comments, I just love hearing what you have to say! Please visit me again soon, or even Follow me so you never miss a thing!