Showing posts with label download. Show all posts

Friday, April 6, 2012

Free Printable Friday - Egg Hunt!


Easter is coming up! And everyone loves a good egg hunt. So I threw together this fun scavenger hunt game with clue flags for your little ones to enjoy! You can write your own clues so the game is customized to your own home, and there are up to 10 clue flags. Stick them right inside some plastic eggs and you're good to go!

You'll have to download this in PDF format since there are lots of bits and pieces. Enjoy!

Download Now!

Friday, March 30, 2012

Free Printable Friday - Formal Table Setting Reference Card

I can't believe it's already Friday again! Well, if I don't have time for crafts, at least I can throw together a few freebies here and there for you guys.

Here is a quick reference card you can stash away in a drawer in your kitchen or something. Whenever you're having guests over for dinner you can pull it out so you know you're setting the table right! How fancy you are!

The JPEG:

Click for full size, right click, 'save image as' to download.

The PDF (for easier printing):

Download Now!


I link here!

Friday, March 23, 2012

Free Printable Friday!

I'm going to try and make it a point to hand out a free printable for everyone weekly. How exciting! It will help me to stay on my creative toes, and it will help you because free things are always awesome! We'll see how long I can keep it up. Hopefully, a very long time!

This week, I have something that I have always needed very desperately in my kitchen. I find myself constantly scrambling to the computer while I'm cooking to look up quick measurement conversions. So I did myself (and you) a favor and made up this cute little printable chart to hang right up on my fridge!


You can either download the JPEG file or a PDF version (easiest for printing, in my opinion).

The JPEG:

Click for full size, right click, 'save image as' to download.
The PDF:

Download Now!

Wednesday, January 4, 2012

Free Printable To-Do List


So in my silly attempts at getting my head organized, let alone my home, I have come up with this actually handy To-Do List! I wanted something simple, useful, comprehensive, yet cute. And it had to be dry-erase-able so that I could use it over and over. Oh and I also wanted something free. 

Now I am sharing the fruits of my labor with you! What I did was I made up the List, printed it out on regular computer paper, then stuck it in a picture frame! Now I can write right on the glass and it wipes right off when I need it to (well, because I use a dry erase marker...).

So here you have it:


Simply click on the thumbnail and download it, print it out, and frame it in a document frame. OR trim the edges up a bit and slide it into an 8" x 10" frame. Enjoy!

Tuesday, December 27, 2011

How To Make A Page Corner Bookmark: Paper Edition!


So I've already made a tutorial for a quick and easy fabric page corner bookmark (which I just adore all of the sudden!) here. But if you've got some pretty scrapbooking paper lying around or if you just aren't a huge fan of sewing, here is a quick and easy paper version of this great craft!

YOU WILL NEED:

  • Paper or cardstock (in two different colors/patterns if desired)
  • Ribbon/tassel if desired
  • Glue
  • Scissors

STEP ONE:

Download and print this template, then cut it out along the outer solid lines. Re-size as desired before printing.

STEP TWO:


Use the template to cut the shape out of your primary pattern of paper. Then snip the little triangles off of the template along the lines for a new square template and cut out a square of a secondary color (or the same color if you choose).


You should be left with this!

STEP THREE:


If you feel like adding a ribbon or a tassel to the corner, do so now by gluing it to the inside of the paper right at the corner between the two wings.

STEP FOUR:


With the tassel now glued down, go ahead and apply glue to the rest of the square portion of the same side of the paper as shown.

STEP FIVE:


Apply the square piece of paper with the colored side facing up, over top of the tassel as well.

STEP SIX:


Fold down one of the wings so that the corner lines up with the far corner of the square piece. Don't glue down this flap.

STEP SEVEN:


Apply glue to the top/colored side of this wing.

STEP EIGHT:


Now fold down the remaining flap to glue it in place. It's okay if some of the under flap is showing. If it bothers you, you can trim it away until it is even with the top flap and no longer visible.

Now you can add any fancy embellishments to the front of it that you want! I like to add ribbons and little things like that, but you can do anything you want!


Then slip it on the corner of a book page and enjoy your new bookmark! You made it yourself! Good job!

Monday, November 21, 2011

Thanksgiving Color-Me-In Pages


Just in time for the big feast! A few festive Thanksgiving pages to print out for your little ones, created by yours truly. Hand them these while you're trying to manage that turkey. It might just keep them busy for a little while for you! Enjoy!

Download Now!

((If that link does not open or is taking too long to load, you may also download the file here. Please don't hesitate to contact me if you have further problems!))

Monday, November 7, 2011

How To Make A Notebook Organizer


((Download this tutorial in PDF format here.))

This cute book holder/notebook oragnizer/magazine container is easy to make and couldn't be cheaper. It's made of a cereal box! I've seen things similar to this in a few different places so I decided I would try making one on my own and sharing with you how I did it.

HERE'S WHAT YOU'LL NEED:

  • Cereal Box (Cheerios works perfectly because the box is huge)
  • Scissors
  • Marker/Pen
  • Glue
  • Scrapbooking Paper

STEP ONE:

Use a straight edge to draw an outline of the shape you want on the box.

 STEP TWO:

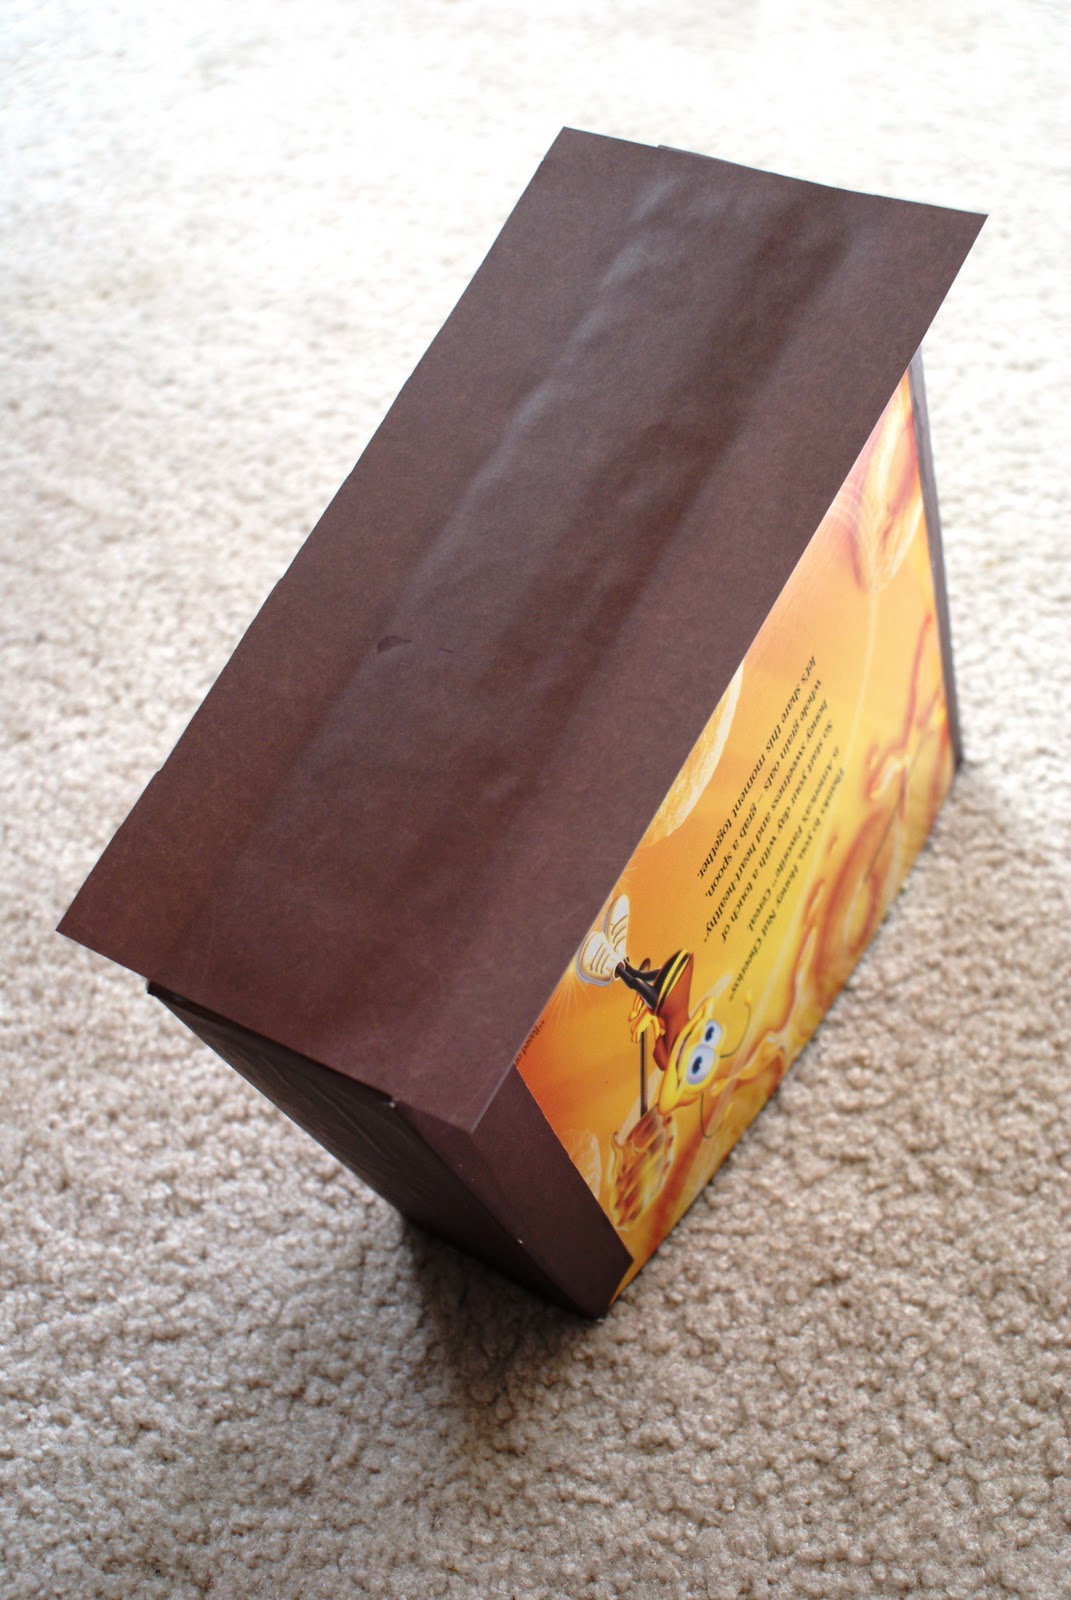
Use your scissors and cut along the lines you made to get your organizer box's shape.

This should be the result.

STEP THREE:

Use the box as a rough template and cut out a strip of scrapbooking paper for the long side of the cereal box. Make it a little bigger on each side than the actual widths of the box so you will be able to fold it over the edges later on.

STEP FOUR:

Apply glue to the long side of the box.

STEP FIVE:

Glue the strip of paper to the box. If you would like, use an old credit card or even the blunt side of your scissors to flatten the paper down. Also, cover the other side as well.

STEP SIX:

Cut out the corners of the paper so that you will be able to fold the flaps down.

STEP SEVEN:

Glue the flaps down. For the top one, make sure it is folded tight against the top edge of the cereal box.

STEP EIGHT:

Glue down the side flaps as well. For this, I found it especially helpful to flatten and crease the paper using my scissors.

STEP NINE:

Cover the bottom side of the box as well, if desired. For the bottom, do not make flaps for the short sides of the box or else you will have unsightly, gluey flaps showing on the sides when you are finished.

When you are finished covering the sides, your box should look something like this.

STEP TEN:

Use your box as a template. Trace the large, flat sides of your box with the wrong side of your paper facing up. When you're done, cut it out.


STEP ELEVEN:

Glue along the outer edges of the box. You can glue the whole surface if you want, but if you are using liquid glue, like I am, you may find that the glue makes the paper lumpy underneath.

STEP TWELVE:

Apply the paper and smooth it out. Again, you can use your card or your scissors to help flatten the paper where the glue was.

Do both sides and you're all done! Good job!

FINAL STEP:

Embellish with whatever you want: ribbons, buttons, paint, labels. You name it! This is your custom organizer, so make it yours.

Sunday, October 30, 2011

Halloween Color-Me-In Activity Pages


I've made some printable coloring book-like activity pages with a Halloween theme just for your little ones! Click the link below to open the file and print!

Download Now

((If that link does not open or is taking too long to load, you may also download the file here. Please don't hesitate to contact me if you have further problems!))

Oh and by the way, the answers are "Trick or Treat" and "12" for the two puzzle pages, just in case your munchkin can't figure it out. Give 'em a hand!

Sunday, October 23, 2011

How To Make Pine Cone Flowers


((Download this tutorial in PDF format here.))

In light of the fall season and upcoming holidays, I have come up with this tutorial on a fun and easy craft you can do with all those pine cones lying around outside. These flowers made of pine cone chips are simple to make and extremely versatile in what you can do with them.

(CLICK ON ANY OF THE PHOTOS TO ENLARGE) 

HERE'S WHAT YOU'LL NEED:

  • Pine cones. Obviously, you are going to need a pine cone for this craft. Any pine cone will do, just keep in mind that different pine cones will make different looking flowers.
  • Scissors. You'll need these on hand for a couple of different reasons. Read on to find out more.
  • Glue. Most any glue will do. Here I am using wood glue, but I bet super glue would make a fine, fast-bonding, fast-drying alternative. I love super glue!
  • Card stock or poster board. You'll need this to make a base for your flower.
  • Paper plate or bowl to work over. Pine cones can get messy!
STEP ONE: Using a small circular object as a template, trace a circle onto your poster board or card stock. The size of your circle will depend on the size you want your flower to be. As you read on, you will be able to figure out how to judge the size of circle you will need for the flower you want.

STEP TWO: Carefully cut out your circle and set the rest of the poster board aside. Also set aside your circle somewhere you won't misplace it.

STEP THREE: Next, take your pine cone. Starting at the bottom, begin to pick away the individual chips of the pine cone. You will probably lose many chips in the process, as they are very brittle and may break easily. That's okay, there are plenty to work with!


STEP FOUR: Work over a paper plate or bowl of some sort to help contain the mess. You may wish to use shears to help get under the chips of the pine cone, picking them off more easily. For some, this may only make the breakage worse. Do what is best for you.


STEP FIVE: Halfway there! You may even choose to stop here and use this remaining chunk of pine cone as a giant flower base. This can be an easy pine cone flower craft for kids as they can glue leaves to the "stem" of the pine cone and base of the intact chips for petals.

STEP SIX: Leave the very last chips intact and twist them off. You can save this end piece as a flower bud for a large pine cone flower display or you can use it as a center piece for your flower later.

STEP SEVEN: Now, take your poster board or card stock circle and apply a little bit of glue to the outer edge.

STEP EIGHT: Carefully begin to glue individual pine cone chips to the outer edge of the card stock. These will make up the outer and bottom most layer of "petals" for your flower. The image below will show you the layers of petals I added to this particular flower. You may layer your flower however you like, based on what look you are going for.
Continue to add layers, as shown above.

STEP NINE: Finish your flower off with a bloom center. For this tutorial, I have used the saved pine cone end from Step Six. You may use anything from nature, such as seeds, weeping grass, whatever you like.

You can make a much smaller flower with a single layer as well. Be creative! When you finish your flower, you can do anything you want with it! Below are some decorating ideas with pine cone flowers. Have fun!


Attach to a ribbon and tie around something (ie. a candle holder, a vase, a lamp, etc.).

Glue onto a homemade card for a unique holiday gift.

Attach to the lid of a box or jar to add a festive touch to your decor.
Related Posts Plugin for WordPress, Blogger...
Top Mommy Blogs - Mom Blog Directory