Showing posts with label tutorial. Show all posts

Thursday, May 24, 2012

Neutral wreath DIY


This wreath was so easy and simple to make, and it's completely neutral. So I think I am going to hang this anytime of the year that I don't have a holiday or theme to decorate for. Wreaths always make your home feel so welcoming!

STEP ONE:


Wrap your wreath form in burlap or your favorite fabric. Secure it with hot glue at each end of the strip of fabric.

STEP TWO:


Make lots of felt flowers or fabric flowers of any kind and with your fabric of choice. Also, cut out a few leaf shapes with pinking shears out of green fabric.

STEP THREE:


Hot glue the leaves onto the front of the wreath.

STEP FOUR:

Then attach a focal point flower on top of the leaves.

STEP FIVE:


Surround your focal point with smaller flowers and you're done! It's simple, elegant, and it's so inviting! Hang it on your front door and enjoy!

Tuesday, April 24, 2012

Maracas

Today I saw this amazing post on MADE about how to make fun little maracas out of left over Easter eggs, which I have plenty of! 


I just HAD to try it with Adrianne. She had so much fun! All you need is masking tape, permanent markers, plastic spoons, something shake-able (like popcorn kernels, rice, lentils, etc...) and of course Easter eggs. Just fill up the eggs, tape it all together, and color on them. Then shake it up! Again, visit Dana's post for a more in depth tutorial.

Monday, April 9, 2012

Napkin Chair Covers


Chair covers are a popular choice of decor because they soften up the furniture and can really add a boost in color. The covers shown above compliment the table cloth and table settings perfectly with the apple green, white ribbon combo.

These awesome chair covers were made by a friend, Heidi! They are pretty and sophisticated, and of course they were simple to make. Can you believe they are made of cloth napkins?

Heidi simply took two napkins, and sewed them together, right sides facing with the ribbon in between, leaving the bottom open to slip them easily over the backs of her chairs. And voila! Cute, easy chair covers!

I've got some extra napkins that I think I'll try this for myself with. Thanks, Heidi!

Thursday, March 1, 2012

DIY Hoop Canopy


I really love the look of the round hanging canopies for over a little girl's bed. So I became determined to make one for my own little one. I was pleased with the way it turned out, and how easy it was too! I made mine with ivory tulle, although I am sure you could use this tutorial with any other light fabric as well.

HERE'S WHAT YOU'LL NEED:


  • Embroidery hoop
  • LOTS of tulle (I used 4 cuts of 3 yards, so 12 yards altogether)
  • Scissors
  • String


STEP ONE:


Fringe one of the short ends of your fabric into 3 inch wide strips. If you're using more than one cut of fabric like me, fringe all of them on one end.

STEP TWO:


Start tying pairs of the strips together around your embroidery hoop. Use only the inner hoop so that you don't have the screw part sticking out of your pretty little canopy!

STEP THREE:


When you've got them all tied on, fluff it up so that the fabric is evenly dispersed around the hoop.

STEP FOUR:


You may hang it however you like, but here is the way I did it. Cut four pieces of string, about the width of the embroidery hoop.

STEP FIVE:


Tie them each to the hoop, equal distances apart. Then tie them all together in the center. It's important that they are evenly spaced so that the canopy doesn't hang lopsided.

STEP SIX:


Cut a piece of string twice as long as you would like for it to hang from the ceiling and fold it in half. Slip the loop end under the knot of the first four pieces of string.

STEP SEVEN:


Tie the string to the knot by pulling the ends of your string through the loop and tighten.

STEP EIGHT:


Now fold the end over...


and knot it, so that you have created a loop with which to hang your canopy!


I hope that wasn't too confusing! Here is what it should look like when it's finished.


Then hang it and enjoy! A simple hook will do the job. Tie back with clips, or anything you like. I love the delicate, wispy feel it gives!

We will be linking to these parties!

Saturday, February 11, 2012

How To Be Creative

"I wish I could do stuff like that, but I just don't have an ounce of creativity in me!"

That is a phrase that I hear all too often. Is that you? Well, my hope with this post is to change your mind on that one.

It is my personal belief that creativity is something everyone has and it's sort of like a little muscle. Like any other muscle in your body, you have to use it and take care of it if you want it to grow and be strong. Also like any other muscle in your body, you have to start small and take it slow with your work outs if you don't want to burn it out and exhaust it.

Here are a few tips pulled from my own experience when working with creativity (both of mine and of others'). Hopefully they can help to rekindle that little spark of creativity within you as well!


ONE: CREATE THINGS


This one may seem redundant but it's like I said earlier. You have to exercise that muscle if you want it to get stronger. Sometimes it's not enough to just sit around all day and think up grand ideas. You have to actually get your hands dirty in order to "exercise" and get more creative. The more you create, the more it will empower you, boost your confidence, and give you experience to build off of.

So get to it. Any little thing will help. Try freewriting. Write something new everyday, like in a journal or something. Doodle on every scrap you ever lay eyes on. Get some scissors and glue and collage the crap out of an old magazine. Make lists about everything: projects you want to do, things you want to experience before you die, places you want to go. Force yourself to think and force yourself to get a little something done every day. Before you know it that daily little something will be a big, beautiful something.

Oh, and be a scientist. Experiment with things. Delve into things you've never tried before and see what happens.

TWO: EASY DOES IT


Also, like I said earlier, you have to start small and take it slow. You wouldn't want to try benching hundreds of pounds on your first try if you've never before lifted a weight in your life. You also wouldn't want to try painting the next Mona Lisa if you've never before held a paintbrush in your life. It's okay, you can even start with finger paints for goodness sake. You've got to start somewhere, so start somewhere basic. Just play with the colors, see what happens when you mix red and yellow. Who cares? Maybe something neat will happen. Then you'll want to keep going. Then maybe something even neater will happen! But whatever you do, take on projects that you know you can finish.

If you aim too high, it's all too likely that you'll get discouraged and easily bored of a project because it is just too daunting. It's happened to me way too many times. I get really excited about a really big project that I've started and I don't let myself take a break. Then I get tired of it because it's too hard and it's taking too long. So then it gets shoved to the back of the closet and forgotten forever. Don't do this to yourself. Just take it nice and easy!

THREE: GET INSPIRED


I read somewhere once that there is no original idea. No matter what you do, it's probably already been done before. Now, obviously this isn't always the case. But the point was that it's okay if you don't come up with a completely original idea because there is always room for improvement. If it's not original, just do it better, make it your own.

So go for it. Look around you and get inspired by things you see. Your ideas don't all have to be born out of nothing in the deep, dark depths of your own head. Take the best bits and pieces of all that you see and put them all together. When you see something you like, ask yourself: "What is it about this that I love and what would I do different to make it perfect for me?"

FOUR: BE A GOOD SPORT


So maybe that thing you just made is hideous and completely non-functional. Whatever, just laugh at it and keep going! Don't be a sore loser. Go back to your list of "Projects You Can And Will Finish" and start the next thing on the list. Or go browse around and see if you find anything that sets off a light bulb in your head, a way to fix your latest oops.

Just don't blame your supposed lack of creativity for a disappointing end result. Everything you create, whether it be pretty or ugly, is more experience under your belt. Have the courage to keep going. You'll be glad you that you did!

FIVE: DE-SCREEN YOURSELF


This might be the most important piece of advice I can give. Turn off your TV. Step away from the screen. Eliminate media from your life as much as possible. Screens suck you in and spit you out, making you wonder where all your time went. And what was it wasted on? "Reality" television?

Go outside. Talk to people. Walk in nature. Experience actual reality. It will open your mind in ways you never would have dreamed. It's amazing what this seemingly simple shift in your life can do for you. It will give you so much time and so much freedom within your own mind. It will pave the road for your creative chariot to charge down.


Now go forth and create! Every single thing you create is a piece of your soul, manifested in the world for all to see and feel. Immerse yourself in your creations and share them with anyone and everyone. Have fun!

Thursday, February 9, 2012

My Babies' Height Chart


I finally finished this thing that I've been attending to for mere minutes per day for a week or so now! If you can't tell, it's a height chart. More specifically, it's a double sided height chart, personalized with each of my babies' initials at the top. Hehe!


The Pooh drawing was also hand drawn by me, inspired by the original illustrations by Shepard.

It was easy to make too! I just cut a long strip of fabric, hemmed it on both sides, and sewed down the top and bottom edges with the sides open so that I could slide a dowel in each end. Then I measured out each foot of it, labeling them from 2 to 6 feet and marked out every inch with a little dash or dot.

 The hubby had to hang it because I am borderline midget. But I've taken Adrianne's first measurement! She hit the 2 ft, 6 inches mark.

I am so excited to be able to track their heights without worrying about losing it all. Since we're currently in an apartment, it would be pointless to write her heights on the wall somewhere because we'll just be moving out (hopefully into our first house) sometime anyway. Then the walls will all be painted over and that will be the end of that. Now I have a portable height chart that I can even pass along to the kids when they're grown and dying for all my silly little baby keepsakes!

Monday, January 23, 2012

DIY Kid's Art Organizer


This little art supply organizer I made was a fun, easy project. So I thought I'd share with you what exactly I did.


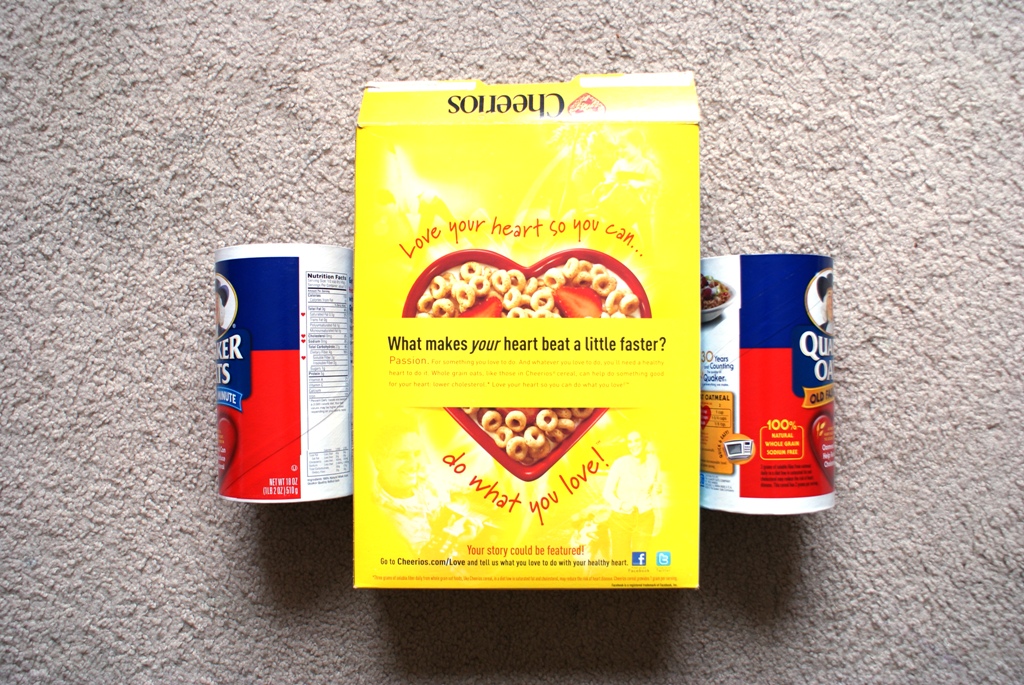
First, I got together a couple of cardboard oatmeal containers and a cereal box. I like the Cheerios boxes because they are bigger than most cereal boxes.


Then I cut them all down to the size I wanted. The oatmeal things were a pain to cut but if you just go slow and trim them afterwards to make them look a little neater, it's not so bad.


Finally, I covered them with colored paper (glued on with just Glue-All or Mod Podge) to finish them up, just like I did in my Notebook Organizer Tutorial. To attach the cups to the box, I used a line of hot glue along the paper seam on the cups and stuck them to the sides of the box.


And there you have it! A cute little storage system for your kiddos! You can even let them decorate it. =) Have fun!


Linked to these parties!

Thursday, January 19, 2012

Mei Tai Style Baby Carrier Tutorial


I've made up a tutorial on how to sew a baby carrier inspired by the Mei Tai or other asian baby carriers. I love this carrier because it is so comfortable for both mama and baby, and the best part is that it is easy to make yourself! Looking around online, I've seen mei tai's for sale for really high prices. After wearing one, I'd say it's worth it. But come on, you can totally make one yourself!

I have a lot of lower back pain, and I can tell you this carrier does wonders for my back. I've had one of those regular old baby carriers and I felt like a cripple every time I took it off. But this baby carrier is awesome.

So anyways, here is your photo heavy, super in-depth-ish tutorial on how to make a basic mei tai baby carrier! ((The measurements I use in the tutorial are for a small/medium size carrier. This size fits both me and the hubby quite comfortably. You may want to just sew on some extra length to the straps if you need a larger size.))

YOU WILL NEED:


Fabric! Sturdy fabric, like canvas, works very well. Here I have 3 yards of quilted fabric so that my carrier is nice and soft, but not too thick.

STEP ONE:


Cut the fabric length-wise so that you have THREE strips of 3-yard long pieces of fabric. Cut ONE of the strips in half so that you are then left with two 1.5 yard strips instead of one 3 yard strip. The width of the strips depends on how wide you want your straps. Make them a little more than double the width you want. So, for example, my strips were about 8 inches wide, giving me 3.5 inch straps once they were finished.

STEP TWO:


Now, fold each strip in half, length-wise, and pin it down.

STEP THREE:


Sew them all down along the open edges, length-wise.

STEP FOUR:


Then sew just ONE of the short edges closed.

STEP FIVE:


This is probably the most exhausting part of the whole project. Turn all four straps inside out. I find this to be easiest if you grab a bit of the fabric from the inside and pull it out as shown in the photo above.

STEP SIX:


Now you don't have to do this part, necessarily, but I like to sew the strap down flat by just sewing a straight line down the middle. Since my fabric is padded, this just makes it neater. If you have an already flat fabric, you might want to try top stitching the strap down all along the outer edges. But this step isn't exactly necessary, like I said.


When you finish, you should be left with four completed straps that look a little something like this:


STEP EIGHT:


Now, with your remaining fabric (or with a separate cut of fabric, if you are unfortunate), cut out two rectangles measuring about 18" x 20" for the body of the carrier.

STEP NINE:


Now we're going to get ready to sew together the body. So we need to pin the straps to new rectangles we have.

Start by pinning the short straps to the bottom. Leave a few inches hanging off the side of the fabric and fold the strap so that it fits inside the body. Copy the photo above. We are going to sew this thing inside out, so get ready for some awkward pinning.


Get the other shorter one on the other side of the bottom of the fabric.


For the long straps, you want to place them diagonally, like so. Fold them down diagonally so they don't get in the way of your edges, where you will be sewing soon.


Keep folding until you have all the straps tucked neatly inside.

STEP TEN:


Pin the other rectangle down over top of the straps now. Make sure you have the edges of both body pieces lined up perfectly. Squeeze it all in there.


I must emphasize the importance of having the straps away from the edges. Stick your fingers in the gaps to make sure they are not in the way. You do not want to sew them down except for where they are sticking out of the fabric.

STEP ELEVEN:


Now sew along the edge of the body, going over the straps as well. Take it nice and slow, one side at a time.

!!IMPORTANT!! Leave an opening at the bottom of the body so that you may turn the whole thing right side out afterwards! See below.


Here's what you'll be left with. Notice the opening at the bottom.

STEP TWELVE:


Begin turning the carrier by pulling the straps out. Then continue to flip the whole thing right side out.


We're getting there!

STEP THIRTEEN:


Fold the opening at the bottom back in and pin it shut. When we do the top stitch, this will be sewn shut.

STEP FOURTEEN:


Top stitch along the very edge of the whole body, making sure that you do indeed catch all of the pinned down opening to ensure that it closes.

STEP FIFTEEN:


For the shorter straps at the bottom, reinforce the straps by sewing a criss-cross shape over them, like I have done in the picture above.


And VOILA! You now have a mei tai style baby carrier!

For steps on how to wear one, check out the tutorials on the web. A good one can be found here. I will try and make a tutorial of my own as soon as possible.


Enjoy your new carrier!

[linked to]
Related Posts Plugin for WordPress, Blogger...
Top Mommy Blogs - Mom Blog Directory